The Wonder of Spirulina

The other day I took a lovely shot of my chopping board full of green, leafy goodness. It was literally a picture of health. Green-anything just screams ‘nutritious’, so much so that just by looking at it you feel better. Honest.

So, goes without saying that the greener the better. Well, I’ve discovered the greenest. Welcome to the wonderful world of spirulina. I had never tried spirulina before up until a few weeks ago when I read an article about it’s nutritional benefits by nuts.com.

We all know how much I enjoy my crazy food adventures, so I thought I should make something special.IMG_1500 Now, I am always hesitant to use the term ‘superfood’, because I really do think that all plant foods are super in their own individual way, but the nutritional profile of spirulina is particularly impressive. Spirulina is a cyanobacterium, a type of algae sourced from lakes and sea-water, and is made up of around 60% protein. It’s also a source of complete protein, which is quite rare in plant foods. Looking at it’s nutritional profile, spirulina is a good source of  Vitamins B1 and B2, as well as iron. Just remember to take the serving size into consideration though, as you only use it in small amounts. A lot of sources claim that spirulina is also a good source of B12, a vitamin particularly important for vegans, however the form of B12 in spirulina is in fact a pseduovitamin – meaning that it looks the same as regular B12, but doesn’t have the same bioactive properties in the body. Those sneaky vitamins.

In terms of health benefits, the research at present has been minor, although a number of studies have shown positive effects on hyperlipidaemia (high cholesterol). One Japanese study based on an animal model with induced atherosclerosis showed significant improvements in both HDL and LDL cholesterol levels after being fed a diet supplemented with spirulina. Human studies have also found significant effects on lowered LDL cholesterol levels, however further research is needed to determine conclusive results due to small sample sizes.

Originally I had planned on using my spirulina in a peanut satay sauce like in the Malaysian dish Gado Gado, but then I had a change of heart as I reminisced about a salad dressing that I remember Jamie Oliver making a while ago called Green Goddess. How appropriate! Apparently the Green Goddess dressing is from a while back, I had never heard of it before, but it’s pretty tasty! The original dressing uses anchovies, so I thought that the spirulina would make a good substitute for that ‘ocean-y’ flavour. It’s a word, yes. And it did.

FullSizeRender


Very Green Goddess Dressing

1/2 x bunch basil

4 x stalks spring onion, green part only

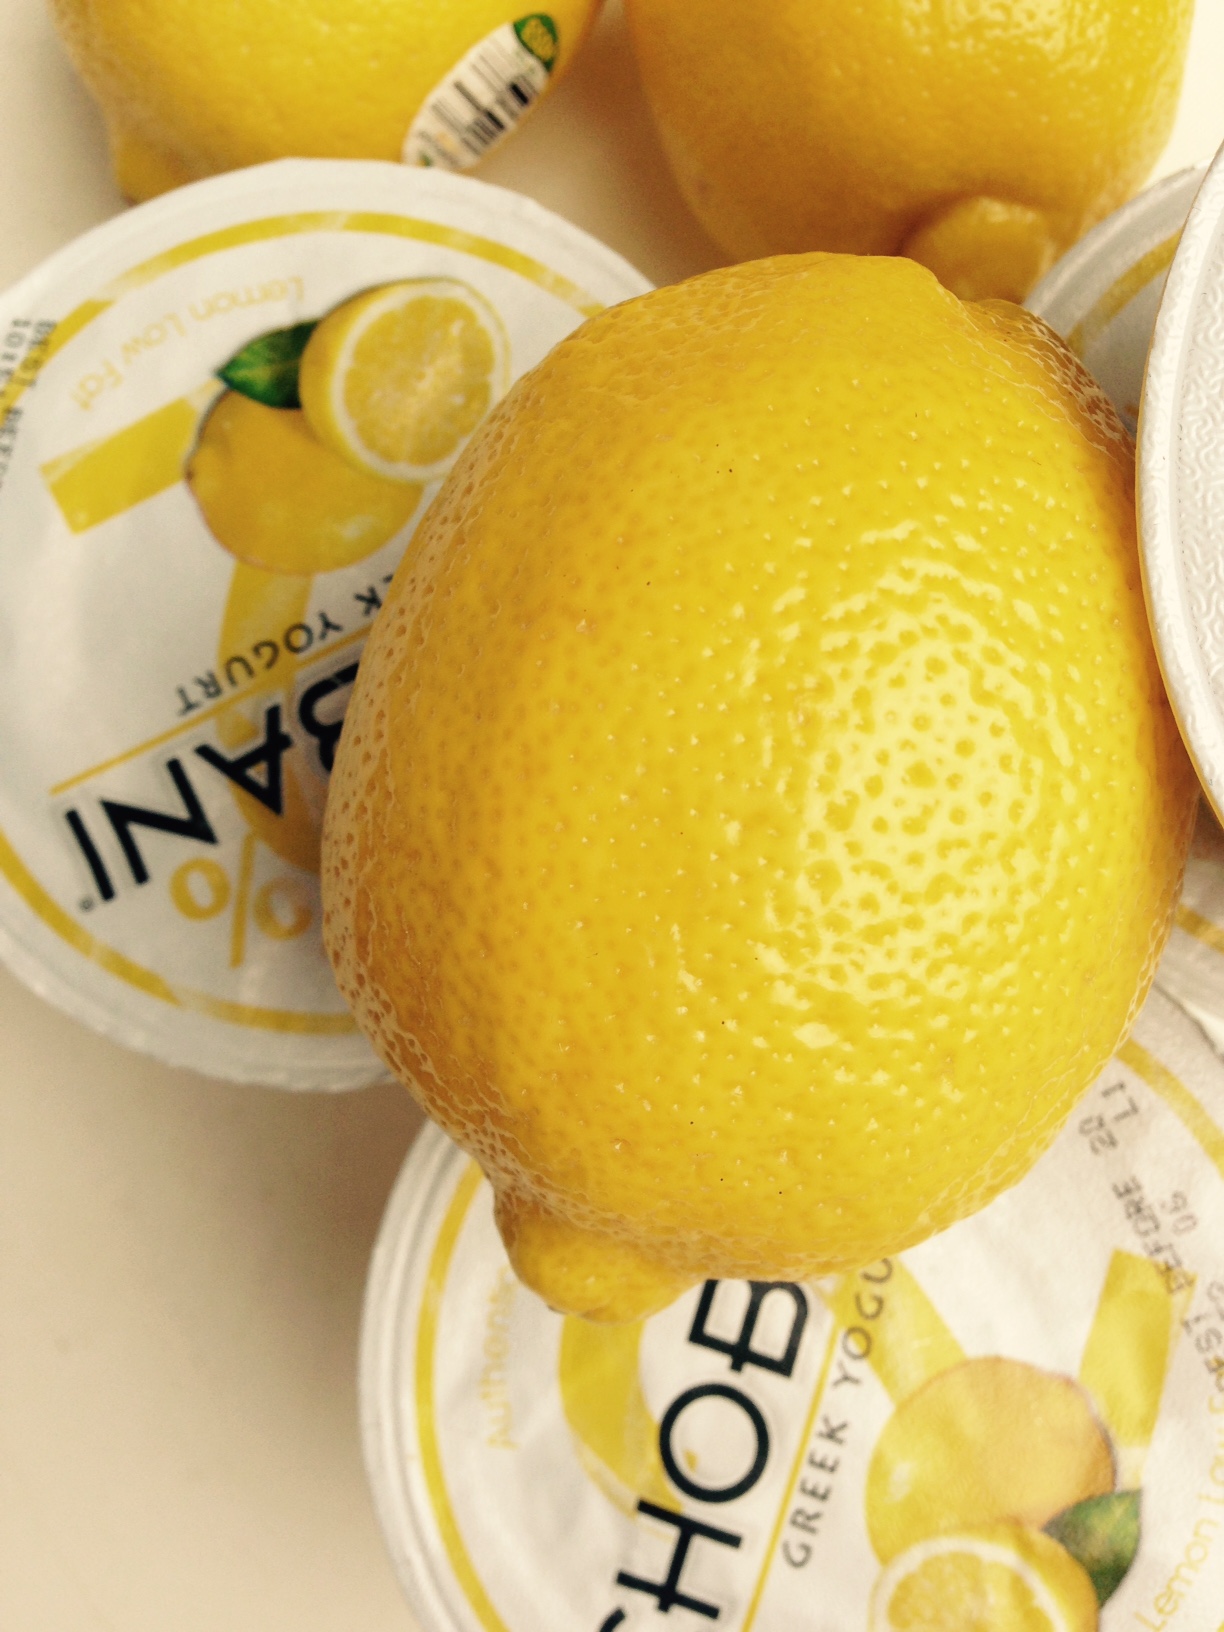
1/2 x cup greek yoghurt

1 x TBS mayonnaise

2 x tsp lemon juice

1/4 x tsp salt

1-2 x tsp spirulina

Place all ingredients in a food processor and blend until smooth.

Can be stored in the fridge for up to a week.

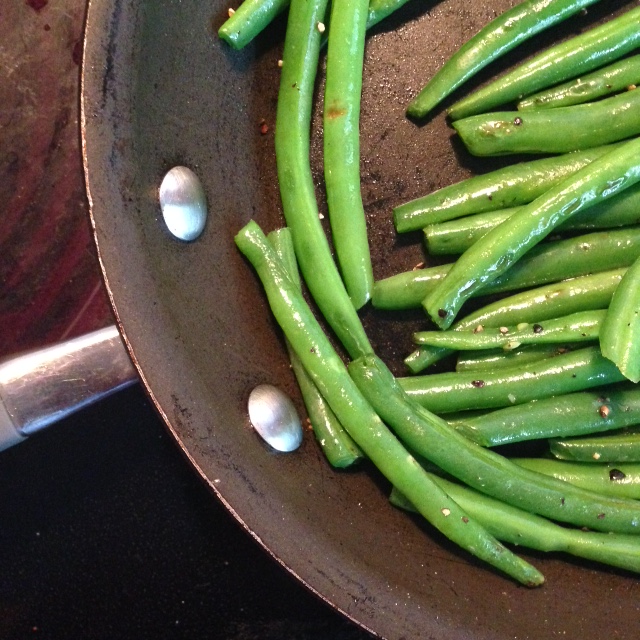
Use as a salad dressing, pour over steamed vegetables, or as a dip for crackers and veggie sticks.


FullSizeRender

Head on over to nuts.com for even more spirulina recipe ideas, including a delicious looking ice cream that I am very keen to try. You can also add a few teaspoons to your smoothies in the morning for an extra vitamin boost. Don’t be scared off by the colour, it may look a little intimidating but mix it in to your smoothies or dips for a healthy dose of green goodness!

Peace, Love & Lentils

Go through your pantry, cupboards, freezer, or fridge; what ‘treasures’ have you found? Pick an ingredient/spice/condiment that’s been hanging out for a while and give it the attention it needs. Share a healthy recipe made using your new-found pantry prize.

Spring cleaning the pantry my shelf in the cupboard. It doesn’t take long.

My share-house-pantry-space-restriction coupled with my disdain for waste means that I don’t often have a whole lot of things lying around for too long. A good thing I suppose. But this month’s Redux theme is the perfect excuse to share a great lentil soup recipe that only requires a few ingredients. I did in fact have lentils in the cupboard, too.

Lentils are simply wonderful. Not only are there a bunch of ways to use them, as mentioned in my previous ramblings, they are nutritionally impressive too. This recipe uses green lentils, which are a variety that retain their shape when cooked, rather than breaking down and going mushy. A cup of lentils gives you 16 grams of dietary fibre, and also provides you with a serving of protein. In addition, because lentils (and other legumes for that matter) are so nutritious, half a cup also count as a serve of vegetables as well. Nice.

Due to the high fibre content of lentils, and other legumes, a lot of people experience digestive discomfort (read: gas, bloating and other fun stuff), so if you’re not consuming them regularly, best to start off slow so that your gastrointestinal tract can get used to it. Whenever we make a major change to our diet, our bodies need time to adjust, so take it easy. It also helps to soak your legumes in cold water over night and give them a good rinse before cooking.

Thanks to Melbourne’s ice-cold chill as of late, I thought soup would be most appropriate. The recipe I’m sharing below is how I usually make it, although on this particular occasion I had to substitute for what ever I had available in the fridge, so it’s pretty versatile. Dinner was literally the other thing that could warm me up today!

kitchen

Lentil Soup

1 x TBS olive oil

1 x brown onion

2 x cloves garlic

2 x stalks celery

2 x carrots

1/2 x cup white wine (optional, but do it)

1 x cup green lentils

1 x lemon, juice and zest

1 x litre of vegetable stock

1/2 x bunch parsley (can sub in dill)

s & p

lentil soup

  • Chop the onion, garlic, celery and carrot finely
  • Heat oil in a large pot over a medium heat
  • Add onion and cook gently for 5 minutes or until softened
  • Add garlic, carrot and celery and cook for another couple of minutes, giving it a good stir
  • Then add in the white wine, vegetable stock and lentils
  • Bring to the boil, then lower the heat and simmer for half an hour or until lentils are softened
  • Add in lemon juice, zest and parsley at the end of cooking
  • Salt and pepper to taste

Cutting back on the salt …

It appears I have been fairly inactive on the blog for a while (and in every single other way too, let’s face it). Let’s just say Easter went for a little too long. So, my healthy cooking has fallen by the wayside a little, and I have been pretty careless about my sugar and salt consumption. Alas, I am not perfect! 🙂 Today’s post is about salt (sodium chloride).

There is a lot of confusion and misperception about salt in the diet. Most people think that because they don’t add salt to their cooking then they don’t have to worry about it – wrong! Salt is hidden in all sorts of things, and it’s pretty scary considering that Australian’s salt consumption is way above the recommended level of 2300mg a day (which equates to just over one teaspoon).

Sodium is a mineral that is important in our body, it is a major part of electrolyte balance, working with potassium and chlorine to maintain an acid-base balance and control osmotic pressure. So yes, it is necessary to have a little sodium in our diet. But guess what? Sodium is naturally occurring in a lot of whole foods including fruits and vegetables, so you don’t have to go adding it on to to your hot chips thinking that you are contributing to your recommended daily intake! The major concern with having too much salt in our diet is the risk of increased blood pressure.

The real problem with salt consumption arises in processed foods. If your diet is high in ready-made, processed foods rather than whole foods, you might want to have a think about sodium. Salt is used as a flavour enhancer and preservative, appearing in just about everything we pick off the supermarket shelf: breads, tinned soups, tinned vegetables and legumes, pasta sauce and condiments, ready-made frozen meals and items such as packet noodle cups. Have a look at the sodium column in the nutrition panel on a processed food product in the pantry (per serve column). Keep in mind that the AGHE recommends a maximum of 2300g per day!

It’s not all bad news though; you can still have delicious tasting food minus the high salt content. My recipe for lentil and zucchini fritters, for example! By using lots of fresh herbs, onion and pepper, you don’t need to add any salt because there is already enough flavour. Salt substitutions can also include lemon juice, chilli, garlic, vinegar and spices. Another important note: a lot of people are under the impression that because it is sea salt, rock salt, pink Murray river salt, salt sourced all the way from the Dead Sea etc. that it is good for you because it has a higher mineral content. Yes, it has a higher mineral content, but it is still salt and still behaves exactly the same way in your body!

Time for food.

green herbs

Zucchini and Lentil Fritters with Fresh Herbs

Makes 6 fritters

1 x zucchini, grated

1 x cup canned or cooked lentils, (no added salt)

½ x onion, finely chopped

½ x cup self raising wholemeal flour

2 x eggs

1/4 x cup fresh dill, chopped

¼ x cup fresh coriander, chopped

Pepper, to taste

Place the grated zucchini, lentils, flour, herbs, pepper and eggs in a big bowl and stir well to combine.

frittermix

Heat up a large saucepan on a medium heat. Use a non-stick pan or a light spray of cooking oil so the fritters don’t stick.

Now get your hands dirty! Form the mixture into patties, and place gently into the hot pan.

Cook each one for about 3 minutes on each side, they should be golden brown. Use a spatula to gently flip over.

fritters

You can serve these fritters with a side salad or have them on their own as a snack. I served mine of a bed of sautéed kale with a bit of lemon juice. Yum! And no added salt 🙂

Cauliflower Dhal -ing

This was one of the earliest vegetarian recipes I can remember cooking, and it’s stuck around for a while. I found it on Susan Voisin’s Fat-Free Vegan Kitchen, the first food blog I had ever encountered, and was in awe of the encyclopaedia of knowledge I had at my fingertips. That was about five or so years ago now, and this recipe is always a fallback.

A ‘what-to-cook-when-you-don’t-know-what-to-cook’ kind of thing.

Dhal is an Indian recipe made with lentils. It can be as simple or as complex as you like, but either way it’s quick, nutritious and cheap. Lentils are classified as a legume, and there are a number of varieties to choose from. Dhal usually uses red lentils, which are a type that breaks down when cooking, giving a soup-y consistency. Other varieties include black, puy and green. These varieties hold their shape much better, and are more useful in salad based recipes. Lentils are a nutritionist’s dream: they are high in dietary fibre and also vitamins and minerals such as folate and potassium – and because they are so nutrient dense, the dietary guidelines consider a serve of legumes to be interchangeable with a serve of vegetables also. Pretty sweet!

redlentil

For those of us who don’t eat meat, lentils also provide an important protein source. In general, plant sources of protein are incomplete (with the exception of quinoa and soy), which means that they do not contain a complete amino acid profile. To get the full benefit of legumes, make sure you eat a variety of plant-based foods. For example, eat your dhal with rice or your beans with bread. This ensures that you are getting all the amino acids your body requires.

Back to the food. This particular dhal recipe is a stand out because of one ingredient in particular: Panch Poran (also known as Bengali Five-Spice). It really does make it spectacular. You won’t find it in any old supermarket though, I got mine from a speciality Indian grocer. If you happen to have the individuals spices on hand though, make it yourself! Panch Poran is made up of fenugreek, mustard, cumin, nigella and fennel seeds, in an equal ratio. I believe that I have made this recipe once before without the Panch Poran, and it was still good, just not as good. If you are feeling really lazy then I guess you can skip it, but hey- your loss. At the very least you want your garlic, ginger, chilli and cumin seeds for flavour.


Cauliflower Dhal with Panch Poran

Recipe courtesy of Fat-Free Vegan Kitchen.

1 x TBS olive oil

1 x large brown onion, finely chopped

3 x cloves garlic finely chopped

1 inch piece ginger, finely chopped

1 x small red chilli, finely chopped

1 x TBS Panch Poran

1 x tsp turmeric

1 x cup red lentils

1 x tin crushed tomatoes

4 x cups water

1/2 x head cauliflower florets

1 x tsp salt

lemon juice and coriander

  • Heat oil in a large saucepan
  • Add onions and cook for five minutes until softened, then add garlic, chilli and ginger and cook for a further minute
  • Add the Panch Poran and cook until you hear the seeds start to pop, about a minute
  • Then add turmeric, lentils, tomatoes and water and give it a good stir.
  • Leave to simmer for 20 minutes
  • Then add cauliflower florets and cook for a further 20 minutes.
  • By this stage the cauliflower should be tender and the lentils should be broken down, add salt to taste.
  • Serve with brown rice, fresh coriander and a squeeze of lemon juice.


Soup & Dumplings

March Recipe Redux Theme:

Two for One

We’re all about cooking once and eating twice. In short, double dinners are better. Show us how you take a favourite recipe already on your blog – and ReDux the leftovers into a new dish. Or, whip up a new healthy recipe and give suggestions on how to make it a second meal.

Short and sweet today because the weekend has completely gotten away from me and it’s bed time.


Miso Ramen Soup … turned into … Steamed Vegetable Dumplings


For the broth:

1 TBS oil

1 piece kombu seaweed

1 inch ginger

2 stalks spring onions, roughly chopped

2 cups water

1 TBS soy sauce

1 TBS miso paste

  • Fry the ginger and spring onions in the oil for five minutes.
  • Add the water, kombu and soy sauce. Bring to the boil then simmer for one hour.
  • Take off the heat and strain the liquid.
  • Add the miso paste and mix well.

tppings

The remaining toppings:

1/4 head of green cabbage

2 corn cobs, roasted

1 bulb garlic, roasted

2 eggs, soft boiled and sliced in half

2 stalks spring onions, finely sliced

100g smoked tofu, finely sliced

100g dried ramen noodles


  • Preheat the oven to 180C.
  • Cut the end off the garlic bulb and wrap in foil.
  • Wrap the corn in foil.
  • Roast in oven for 40 minutes.
  • Remove from oven, slice kernels off corn and place in bowl.
  • Squeeze garlic from pods and place in bowl.
  • Slice cabbage thinly and place in bowl.
  • Prepare the noodles according to the packet instructions.


When all the elements are done…

  • Pour the hot broth over the vegetables and noodles.
  • Top with boiled egg, tofu and spring onions.

ramen

What did I do with my leftovers? Make dumplings of course.

  • Take out the ingredients from the soup, that is: the cabbage, corn, tofu, spring onions and garlic.
  • Place them all in a food processor.
  • Add in a 1 inch piece of ginger.
  • Blitz it all up until finely chopped.

wrappers

  • Fill dumpling wrappers.
  • Place in steamer basket and steam for 10 minutes.
  • Serve them alone or with the broth you had for dinner last night!

dumplings

The end.

Lemon ‘Cheesecakes’

These were inspired by my discovery of Lemon flavoured Chobani. A low fat, low sugar alternative to regular cheesecake – no cream, no butter, no actual cheese..more like a delightful yoghurt tart! But that doesn’t sound as good does it?

lemcho1

There’s no denying that cheesecake is delicious. But I am here to provide an [almost] equally as delicious alternative, with a whole lot more going for it. I love my Chobani. Mostly because they have this mysterious way of getting really, really thick yoghurt without the fat and with heaps of protein. They say it’s all in the whey removal process, but I reckon they’re holding something back. Why can’t other yoghurt brands come close?? Anyway, enough conspiracy theories. More food.

lemoncho

Lemon ‘Cheesecakes’…

For the base:

1/2 cup macadamias

1/2 cup coconut

1/4 cup oats

3 fresh dates

For the filling:

3 x 170g tubs Chobani Lemon flavour

1/2 x cup water

2 x tsp agar agar

1/2 tsp vanilla

For the topping:

3 x lemons (juice and zest)

125g sugar

1 tbs corn flour

2 tbs hot water

3 eggs


Ok, you guys are going to hate me. I used the agar agar again. It’s such a pain but I really do prefer it to the bones and cartilage in gelatine. Ouch.

The base is the easy part. In a food processor, combine oats, coconut, macadamias and dates until they come together to form a sticky clump of dough.

Press about a tablespoon each into the base of a 12-hole muffin tin, and bake in the oven for 10 minutes. Allow to cool.

For the filling: heat 1/2 cup of water in a saucepan and mix in the agar agar. Simmer for five minutes until the agar is dissolved and the liquid is thickened.

Empty your Chobani tubs in a big bowl and stir through the vanilla, then pour the agar liquid in and stir as quick as you can. It’s gonna go lumpy. You might get teary. But don’t stress too much about it, it’ll taste good, ok?

Spoon the yoghurt mixture onto the cooled bases. Fill the muffin holes to the top. Then place in the fridge while you make the topping.

I just have to stop you there. This was a momentous occasion for me, because I discovered how delicious lemon curd was. Oh my. Words can not describe. And this is the relatively healthy version without the butter!! It’s dangerously easy to make.

lemonch

In a saucepan, heat up lemon juice and lemon rind, then stir in sugar until dissolved. In a separate bowl, whisk the eggs. In another bowl, combine the corn flour with hot water to dissolve and thin it out.

Using a whisk, gradually pour the beaten eggs into the lemon syrup mixture. Do it slowly – you don’t want the eggs to scramble. Whisk, whisk, whisk away. It will take a good five minutes and you will feel like you’re wasting you’re life, until FINALLY, you see it come together. It should be thick and smooth and luscious. Stir in the cornflour mixture until well incorporated.

Then, remove the cheesecakes from the fridge, and top them with a tablespoon of lemon curd. You can be a little bit fancy and put a lemon slice on top. But to be honest I only did it because these were a birthday present! Leave them in the fridge for a few hours, ideally overnight, and then share the love. X


Next of Kin

This one was an accidental find. Kind of one of those bittersweet moments that force you to look on the bright side. I was only here because I may have destroyed the side panel of my car in a hurry to get to work…and the repair guy was a few hundred metres down the road…

Silver lining: I had a couple of hours to kill and discovered Next of Kin. Only a baby, these guys opened up three weeks ago, and things are looking good. I kept it pretty simple with a coffee and old reliable avo on toast. But my Noisette bread and 5 Senses coffee really kicked it up a notch. Gosh, good bread is under rated. This multi grain was satisfying.

NOKcoffee

I had a laugh to myself as my dish was served, and I admired the huge serving of perfectly ripe avocado on my plate. Only yesterday I was advising a client that one serving of fats and oils is a teaspoon of avocado. A teaspoon! I know, it makes me sad too. Ah well, things could be worse. I appreciated it whole-heartedly.

NOKavo

NOKmenu

The menu is small but they offer a good selection. Crumpets with baked peach, citrus curd, aerated strawberry mascarpone, and roasted macadamias, anyone? Or how about spiced lamb shoulder tacos for my carnivorous friends? Service was very attentive and super sweet, lots of smiles all round. The sun was shining, why not? There appears to be a nice courtyard out the back too. Oh, and the car panel is good as new. Happy days. X

Next of Kin on Urbanspoon

My Scoby Baby

Welcome to the world of fermentation. A bit of a hot topic in the nutrition field lately, fermentation refers to a chemical process by which bacteria and yeasts are broken down and converted into acids or gases. How does this relate to food? Fermented food is beneficial for our gut health, promoting good bacteria growth and supporting a healthy immune system. The health claims are wide and varied (from restoring hair colour to decreasing anxiety), but bottom line – fermented foods taste pretty awesome. Popular types of fermented foods include sauerkraut, yoghurt and miso.

One you might not have heard of before is kombucha. (My mac doesn’t even know what it is, if you were sitting next to me right now you could see the red squiggle from my spell-check). It’s a thing, trust me.

Kombucha is a fermented tea drink made with regular old tea leaves, a bit of sugar, and a little friend called Scoby. Scoby stands for ‘symbiotic colony of bacteria and yeast’. It is a vital component in brewing your kombucha, because that is what eats the sugar in the tea, causing the fermentation process to occur. So how does one get this scoby baby? You need a pretty good friend. Luckily, I have one. If you don’t, never fear, you can purchase a scoby starter culture online (although I have never done it before). The reason you need this good friend, is because once you start falling in love with brewing fermented beverages, you will start making multiple batches, and as a result, your scoby will grow. You could be a greedy bitch and keep them all for yourself I guess, but usually one is suffice, which is how I got mine very kindly given to me as a gift.

scoby

Once you have yourself a scoby, the rest is simple. You’ll need:

1 x large glass jar

4 x tea bags

4 x cups of boiling water

1/2 x cup sugar

1/2 x cup already brewed kombucha (get this with your scoby)

  • place the sugar and boiling water in a large bowl/plastic container/saucepan and stir to dissolve – do not pour straight into glass jar because glass jar will crack – surprise surprise!
  • once dissolved, add the tea bags in and leave to sit until the liquid has cooled down
  • once cooled, add to glass jar with your scoby and cover with a clean cloth (i secured mine with a rubber band) – you don’t want to put the lid on because the oxygen needs to circulate.
  • leave to sit in a dark place for 4-7 days

I am three days in. I haven’t tasted it yet but allll in good time. The longer you leave it, the more vinegary the kombucha will be. Sounds gross but it’s good! When ready, it will taste like a tangy iced tea. You can also bottle it and store it for a little longer which will cause bubbles to form and turn the kombucha fizzy.

The possibilities are endless! You can understand my excitement, correct? Try out other teas like chai or green tea. This study looked at the antimicrobial properties of a number of kombucha tea types and found that green tea showed the highest antimicrobial potential. You can also experiment by adding flavours such as ginger and lemon.

Who needs a baby when you have a scoby to look after?!


kombucha2

Day 6: I tried it today: perfection! It’s a little fizzy and a little sweet and sour. Once it’s to your liking, remove the scoby and reserve it with 1/2 cup of kombucha, ready for a new batch. Then, keep the rest of the kombucha in a bottle in the fridge.

Choc Mint Slice: A Match Made in Heaven

Does your chocolate need a friend? This month’s posting will be after Valentine’s Day, so you may have a bit of extra chocolate around. What’s your favorite chocolate match? Be it traditional peanut butter or something more exotic like cayenne + chocolate.

I can’t say that I had a lot, or any, chocolate lying around after Valentine’s day – but that’s never stopped me baking before.

I have many a favourite chocolate match: chocolate and orange, chocolate and salt (chocolate covered pretzels anyone?!), chocolate and cherry, chocolate and bacon  (it exists!) aaannndd good old choc mint. Reminisce to my high schools days when a trip to the bakery for a peppermint slice every morning was the norm (I know, I’m screaming on the inside) – but thank god I’ve found a healthy version!

Discovered over at Food Daily it looked too good to ignore. Low in saturated fat and added sugar, and a good hit of calcium and protein from the filling = bliss!  Antioxidants and minerals from those emerald green pistachios? Tick! The peppermint slice of a nutritionist’s dreams, what more could you want?

Alas, there was one problem: it contained gelatine. Oh, why do you taunt me so? Gelatine is out in my books, so I was forced to find another alternative (a more expensive, more pain-in-the-ass alternative) but it happened. Cue: agar agar.

Agar agar is a type of seaweed. It’s actually quite amazing but very tricky to work with because you need to be super precise with your measurements otherwise you end up with a rock. I found this magical seaweed and attempted to make the recipe only for it to be a complete, albeit delicious disaster. It was a gooey mess.

Round two, much better.

After a momentary panic due to a chocolate seizure – I learnt what this is the hard way – I brought it all together in the end. Let me just say, if you are melting chocolate and yoghurt together, do it AT THE SAME TIME, not one after the other. Who knew?! I’m a nutritionist not a chef!

If using gelatine, this recipe will be a breeze.

If using agar agar, just read the packet instructions about 17 times and you should be ok.

If it’s a massive fail, it can’t be too bad. Chocolate, pistachio and mint in any form is heavenly.

chocmint2

Choc Mint Slice

  • 1/2 cup rolled oats
  • 1/4 cup cocoa powder
  • 1/2 cup unsalted pistachios, shelled
  • 3/4 cup dates, soaked in hot water
  • 1 tbs olive oil
  • 2 tbs gelatine  2 level tsp agar agar
  • 2 tbs caster sugar
  • 500g cottage cheese
  • 1/2 tsp peppermint extract
  • 200g dark chocolate (70%)
  • 2 tbs Greek yoghurt
  • 1 tbs unsalted pistachios, shelled & roughly chopped
  1. Preheat oven to 180°C. Line the base of a rectangular pan with baking paper.
  2. In a food processor, combine oats, cocoa and pistachio until fine. Add the soaked dates, a few at a time, to form a dough. Then add oil to bring together.
  3. Press into prepared pan with your hands and bake for 10 minutes. Set aside and allow to cool.
  4. In a small saucepan, bring 1/2 cup cold water to a simmer, and add in agar agar. Stir really well to dissolve. It will thicken instantly, but as long as you keep it hot it won’t set.
  5. Dissolve sugar with another 1/2 cup hot water to make a syrup. Add the sugar syrup, peppermint extract and cottage cheese to the food processor and blend until smooth.
  6. Now, working really quickly, combine the agar agar with the cottage cheese mixture in a bowl and stir frantically. The agar sets when it starts to cool so you need to be quick!
  7. Pour mixture over chilled base and refrigerate until set firm.
  8. Place chocolate and yoghurt in a bowl over a saucepan of boiling water, TOGETHER, stirring until melted. (This is where the seizure happened..)
  9. Spread chocolate evenly over the peppermint layer then sprinkle with chopped pistachios.
  10. Chill and cut into even slices.

chocmint


Vegetarian [kind of] meets BBQ

I guess you could say I was a little out of my element? The BBQ and I aren’t exactly the best of friends…

A few months ago the Recipe Redux theme was ‘Start Smoking in the New Year’ – (yeah, I’m getting in a little late) hence the BBQ idea popping up:

The New Year is heating up with smoke and spiciness. From boldly flavored smoked salts to actual smoking techniques, subtly smoked food is on-trend. The same can be said for spice as we savor heat from harissa, sriracha and smoked paprika. Show us the healthy dish you’re heating up with smoke and/or spiciness.

My first thought was my Vegetarian Chilli but then I thought I should try something new. I follow a few American nutrition and food blogs and quite often see a recipe call for ‘Liquid Smoke’, but I have never been able to find it anywhere in Oz. So the cheat’s way was out…then I wondered how I would go about doing it the proper way. But how to smoke food without a barbecue? This just opened up a can of worms..and a trip to the hardware store… and a house smelling like ribs. Got there in the end.

Smoked Tofu, Almonds & Green Beans.

Once upon a time I found a block of smoked tofu in a health food shop. It was delicious, and expensive, and I never bought it again. So here is an attempt to recreate it! And an impressive option for all you vegetarians and vegans going to summer barbecues, only to face a sad bowl of ice berg lettuce and bread rolls with tomato sauce. I feel ya. Take this and everyone will want to be your friend. I mean, it’s not going to pass as sticky ribs anytime soon, but who wants to have to eat with their fingers and get sauce all over their face anyway? 

IMG_1201

Get your smoke on.. 

1 x block of tofu, cut into slices

1 x cup wood chips (I used hickory)

1 x aluminium baking tray

a lot of foil

Soak the wood chips in water over night. Layer the bottom of the tray with the wood chips and a little bit of water, then sit an elevated tray inside the aluminium tray for the tofu slices to sit on. Wrap well in foil. Place in the oven and leave it in there for 3 hours.

SIX HOURS later and I took my tofu out of the oven.

To be perfectly honest, I was really disappointed that it wasn’t ‘smokier’. Seeing as how I had committed half my life to this recipe, the tofu was a bit of an anti-climax. Ahh well, you live and you learn. The end result was delish – read on for the saviour – the tahini dressing and green beans are a win for sure.

greenbeans

And the rest…

2 cups green beans

1/2 cup roasted almonds, chopped

100g fresh rocket leaves

2 TBS tahini

1 TBS lemon juice

salt & pepper

Top & tail the beans and saute them in a bit of olive oil. Add them to a big bowl with roasted almonds, rocket and tofu.

Combine the tahini, lemon juice and s & p in a small bowl and then pour it on over. I added a little warm water to the dressing to thin it out a bit, but whatever goes.

(I will certainly not hold it against you for saving six hours and not trying this one at home).

The end x